Design your database schema
Draw tables, columns and relations for a database component, and export an ER diagram.
What you'll get
- Tables linked to a database component
- Relations between tables
- An ER diagram export
Pick a database
Click DB Schema in the tab bar. The left panel lists the data components from your Architecture tab, such as databases and caches. Click one to open its schema. All entities at the top takes you back to the list.
The words follow the kind of database. A SQL database has tables, a document database has collections and a key-value store has key patterns.
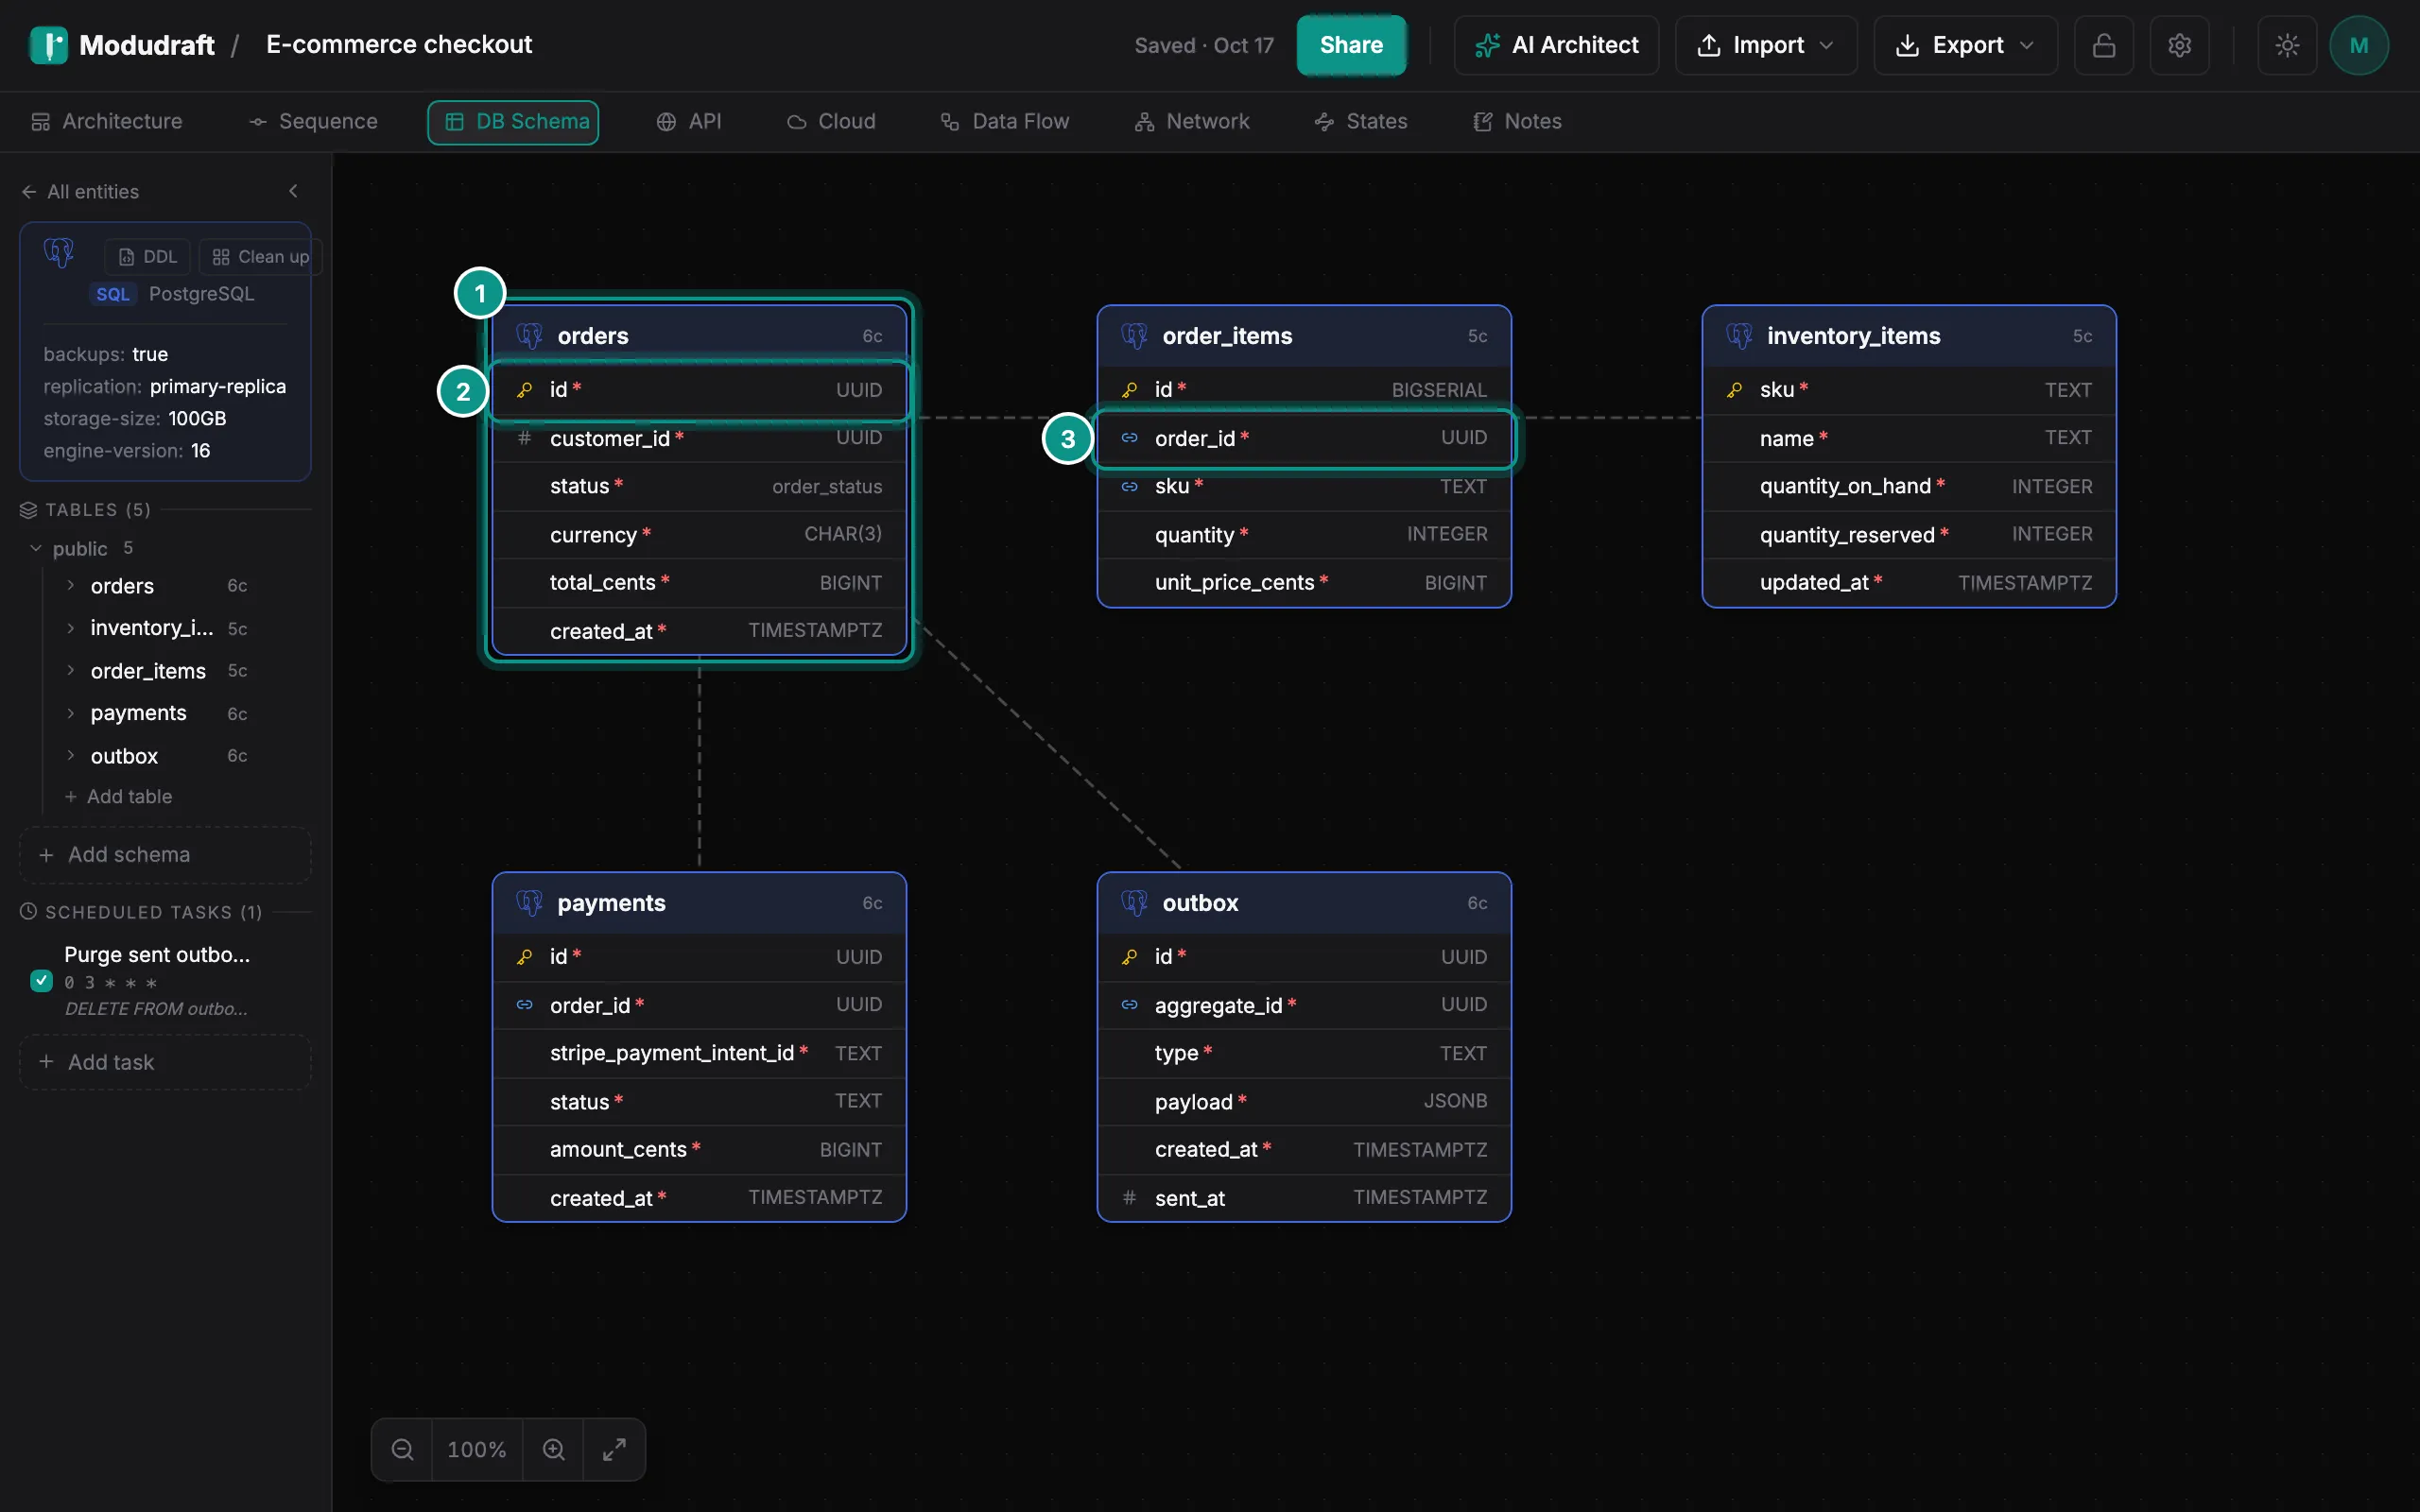
The canvas shows each table as a card (1). A key marks the primary key (2), and a link icon marks a foreign key column (3). Dashed lines join the tables that refer to each other.
Add tables and columns
In the left panel, click Add table under a schema, or Add schema to start a new one. Click a table in the list to see its columns there.
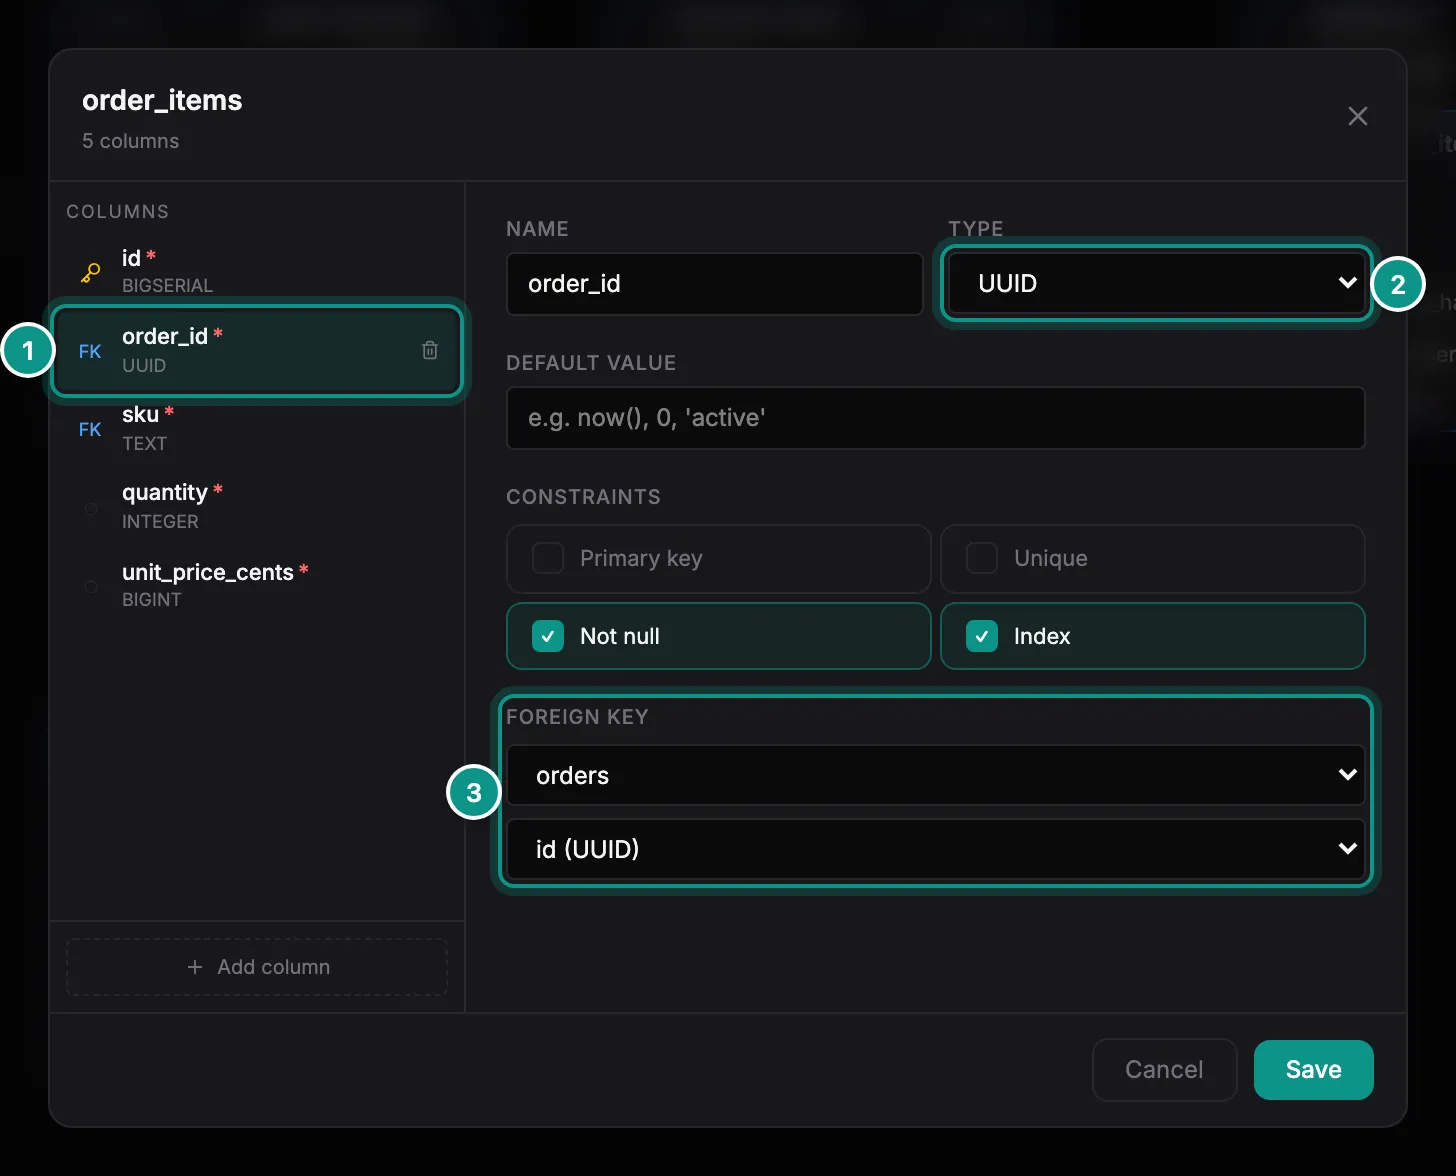
To edit a table, point at it in the list and click its pencil. The table dialog lists the columns on the left. Click one to edit it (1): its name, its type (2), a default value and its constraints, such as primary key, unique, not null and index. Add column adds another. Click Save to keep your changes.
Relate tables
Relations come from foreign keys. In the table dialog, select a column and pick the table and column it refers to under Foreign key (3). Save, and a dashed line joins the two tables on the canvas.
The left panel also holds Scheduled tasks, such as a nightly cleanup job, with a cron schedule.
Export an ER diagram
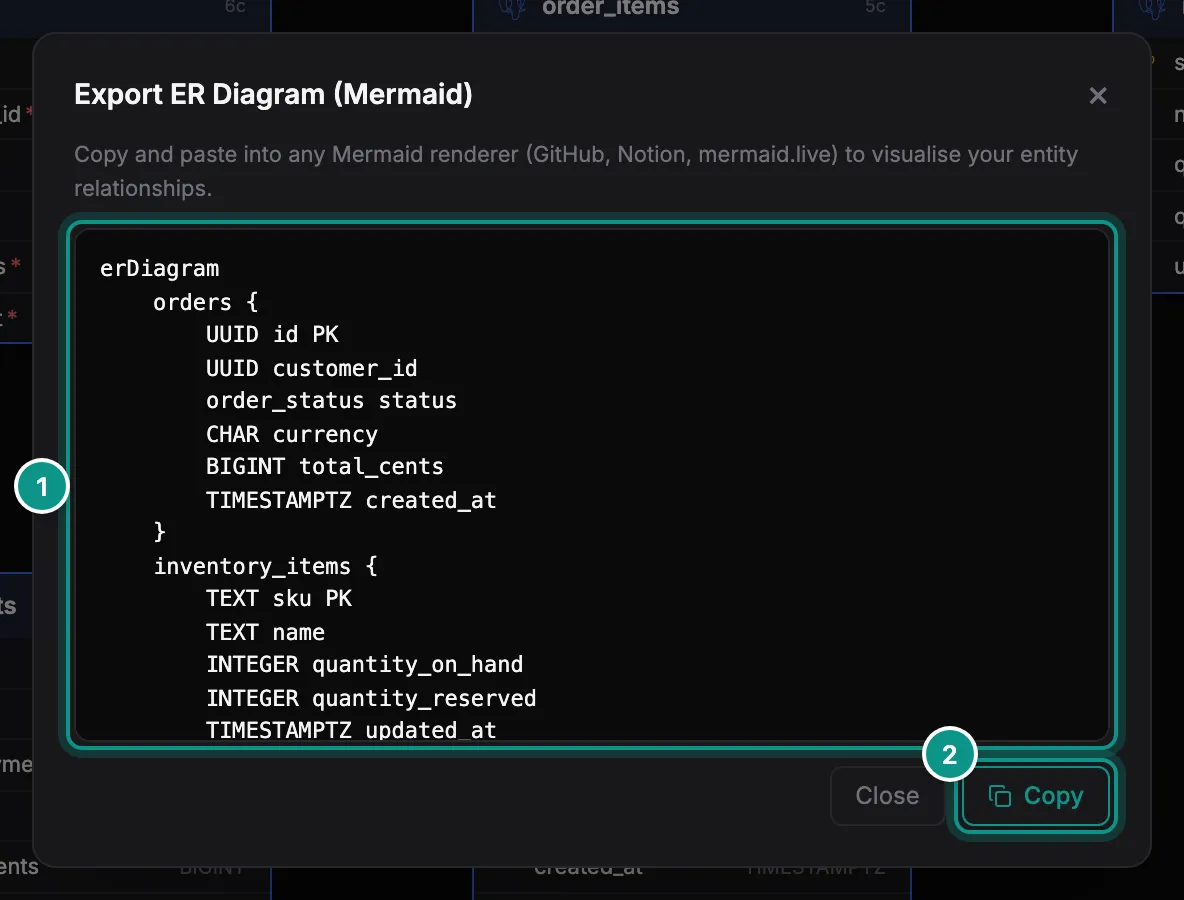
Open Export in the toolbar and, under This tab, choose ER diagram…. You get a Mermaid ER diagram of every table in the diagram (1), with its keys and relations. Copy (2) puts it on your clipboard. GitHub, Notion and mermaid.live can draw it.
For SQL, click DDL at the top of the left panel to get CREATE TABLE statements for the open database.
Next, describe the endpoints of your services in the API guide.