Model a state machine
Show how a service's data moves through its states, and link each step to the API events that drive it.
What you'll get
- A state machine on a service
- Triggers linked to API events
Open the States tab and pick a component
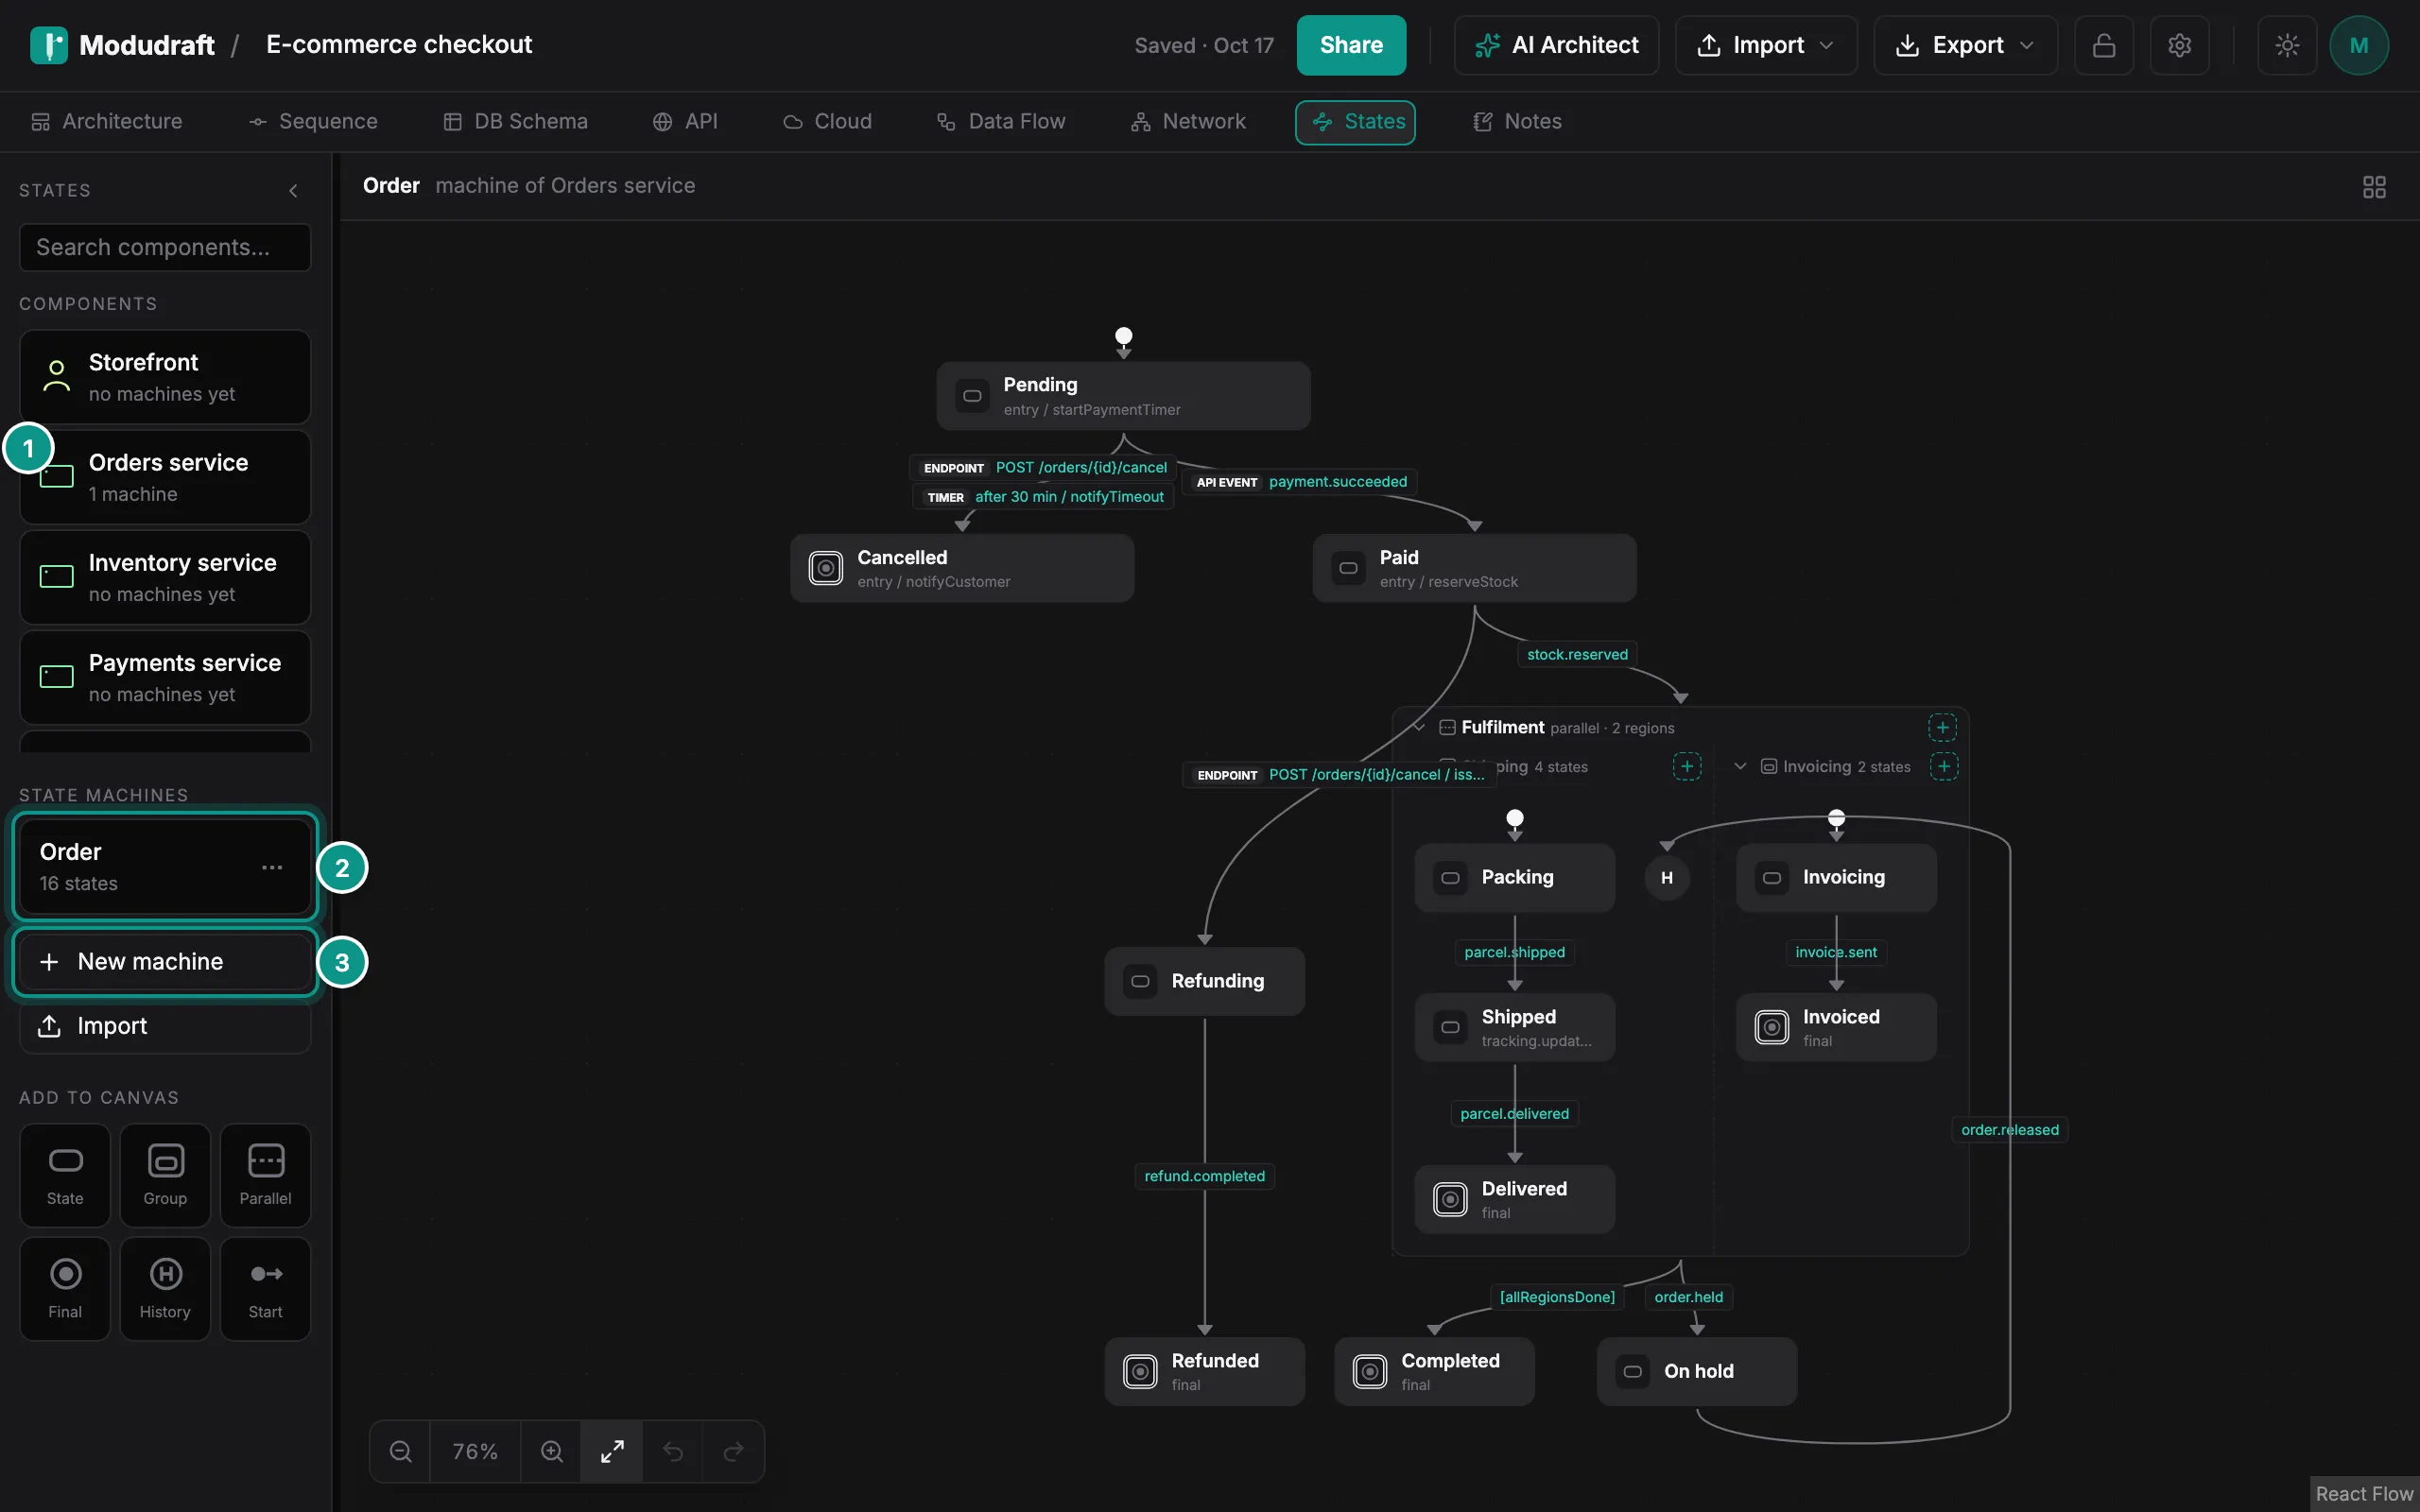
Click States in the tab bar. The left bar lists the components that can have a state machine: services, functions, clients, workflows, auth and realtime components. Each row shows the component’s icon (1), its name and how many machines it has. Click one to open it.
Under the list are the machines of that component (2). Click a machine to open it. Use New machine (3) to add one, or Import to bring in Mermaid or XState text. The ⋯ on a machine renames it, describes it or deletes it.
Build states on the canvas
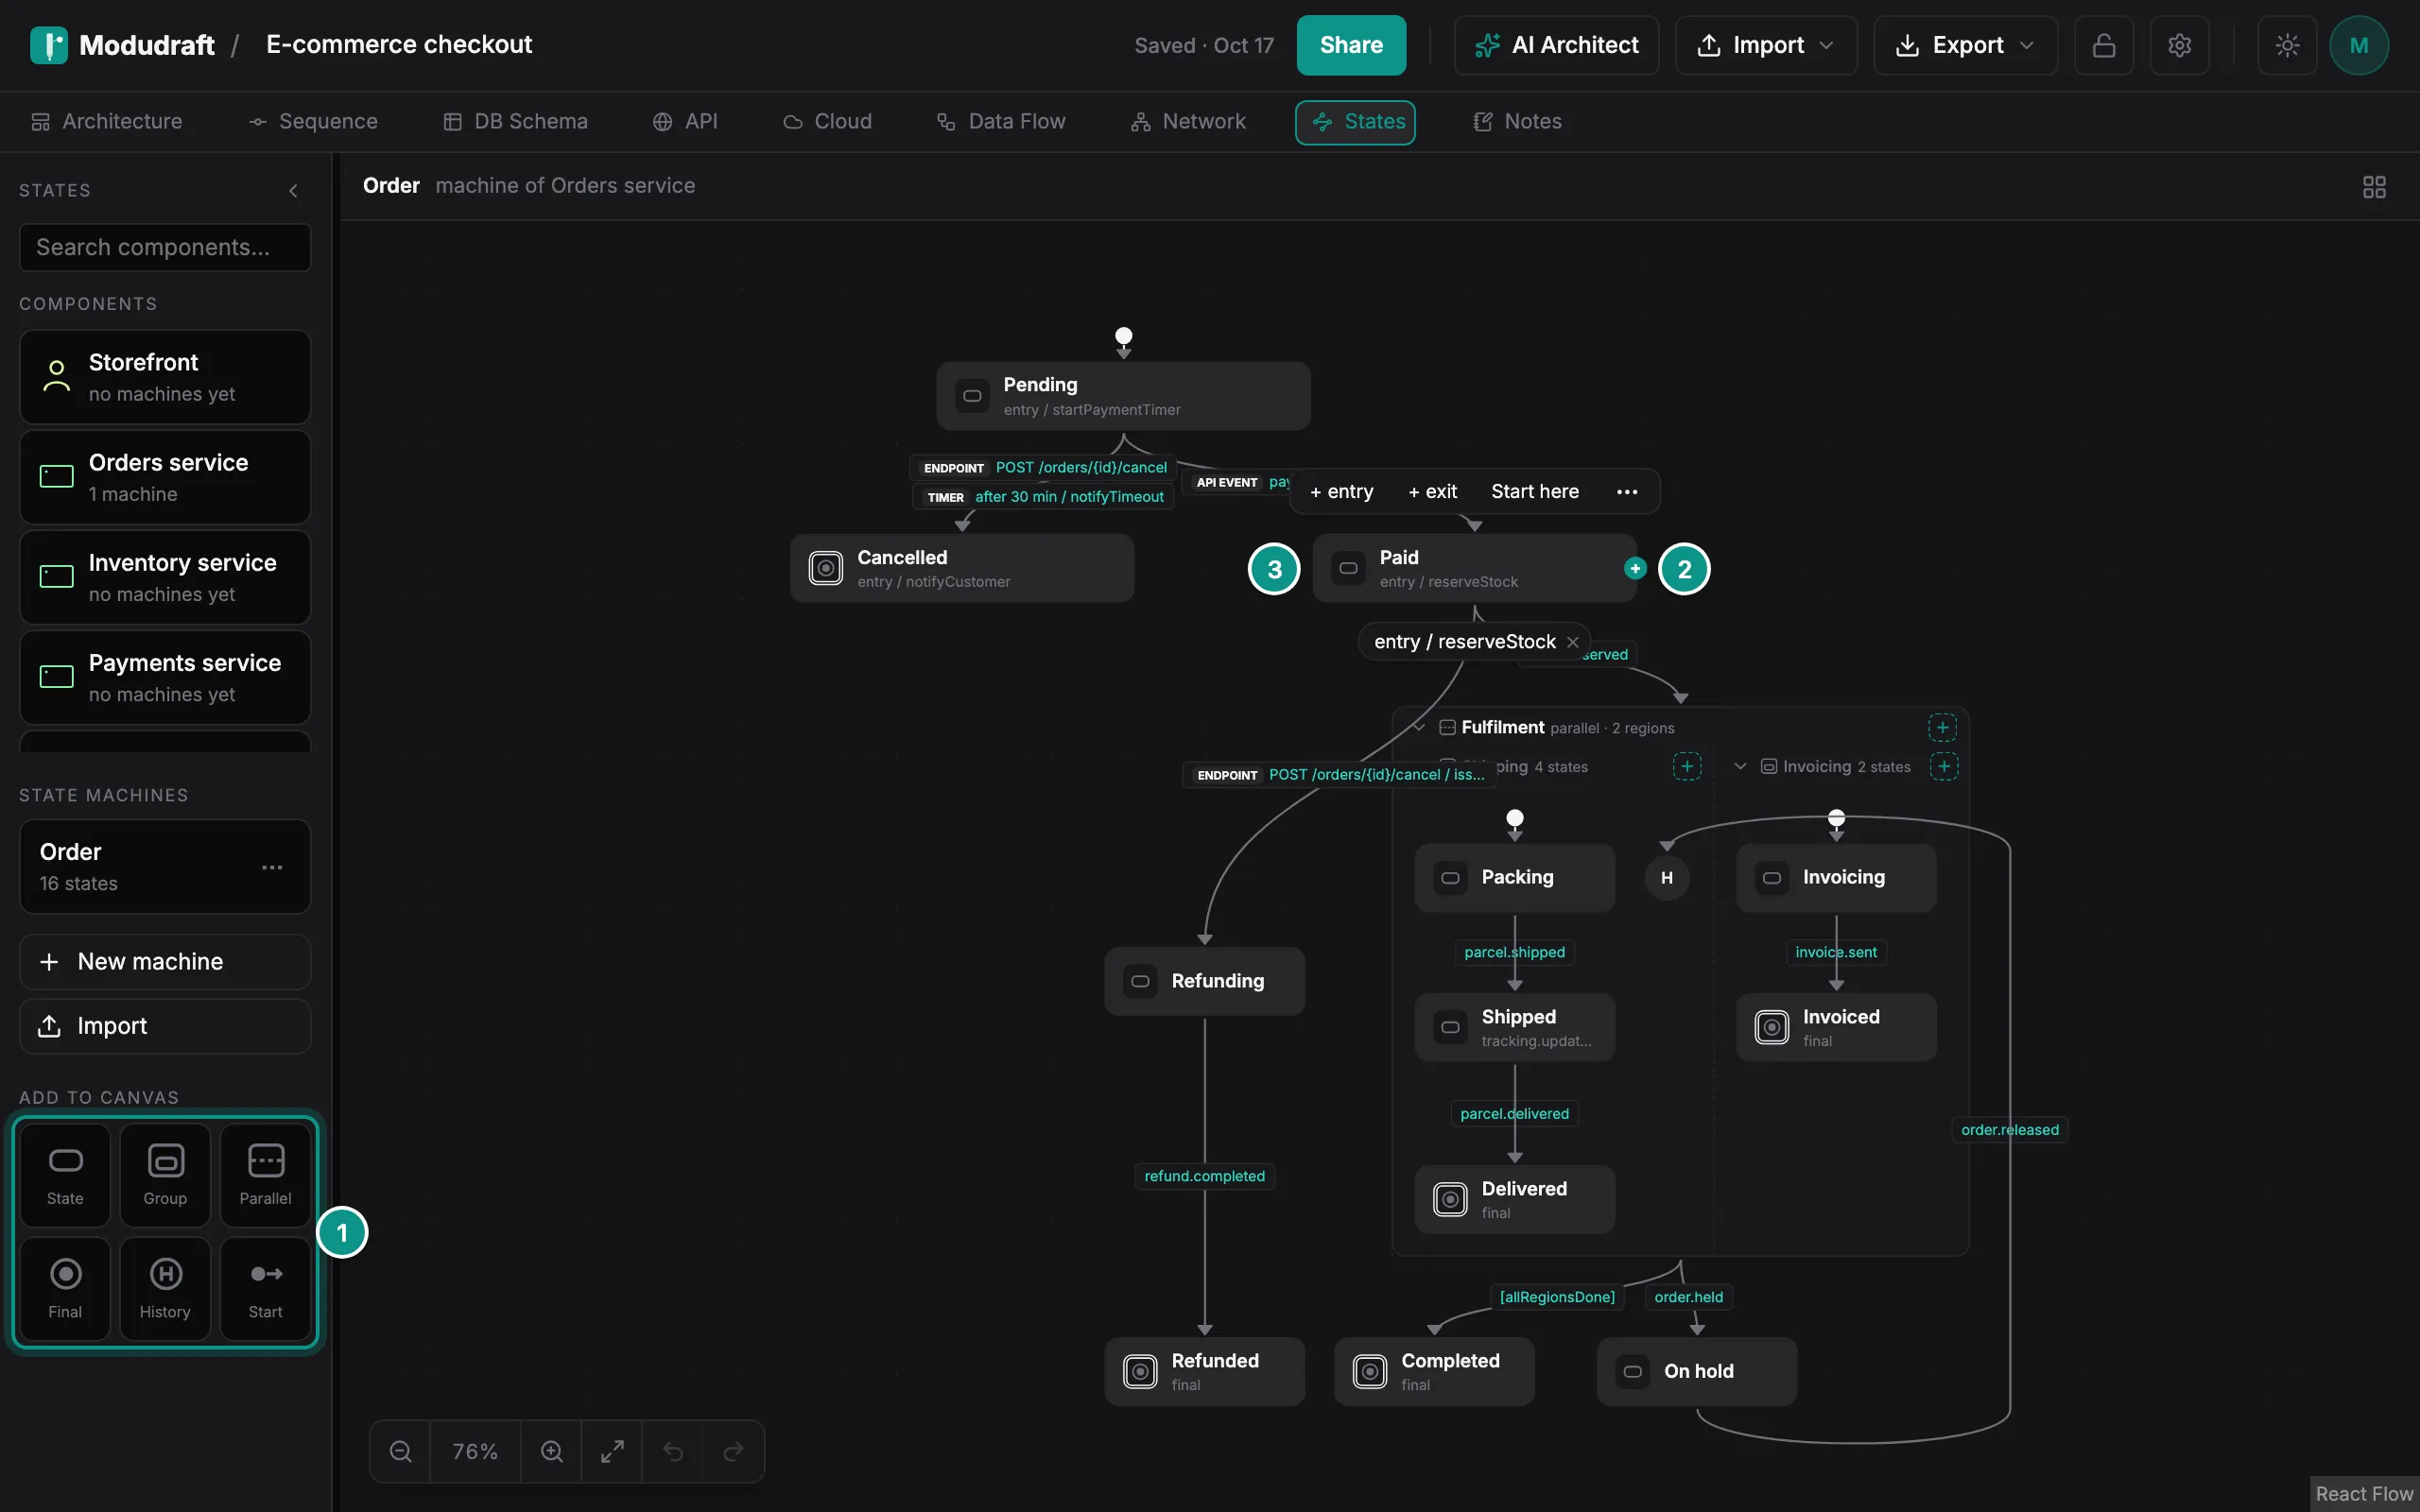
Under Add to canvas the palette has six tiles (1): State, Group, Parallel, Final, History and Start. Click a tile to add it in the middle of the part of the canvas you can see, or drag it to the spot you want. A new state opens with its name ready to type. Start and History work on the selected state: Start needs a state selected and makes it the first state, and History goes into the selected group.
Hover a state to see the blue + on its right edge (2). Drag it onto another state to draw an arrow between them. Drag it onto an empty spot and Modudraft adds a new state there, already connected. One undo removes both.
Double-click a state (3) to rename it. Press Enter to keep the name, or Escape to cancel.
Groups and parallel states
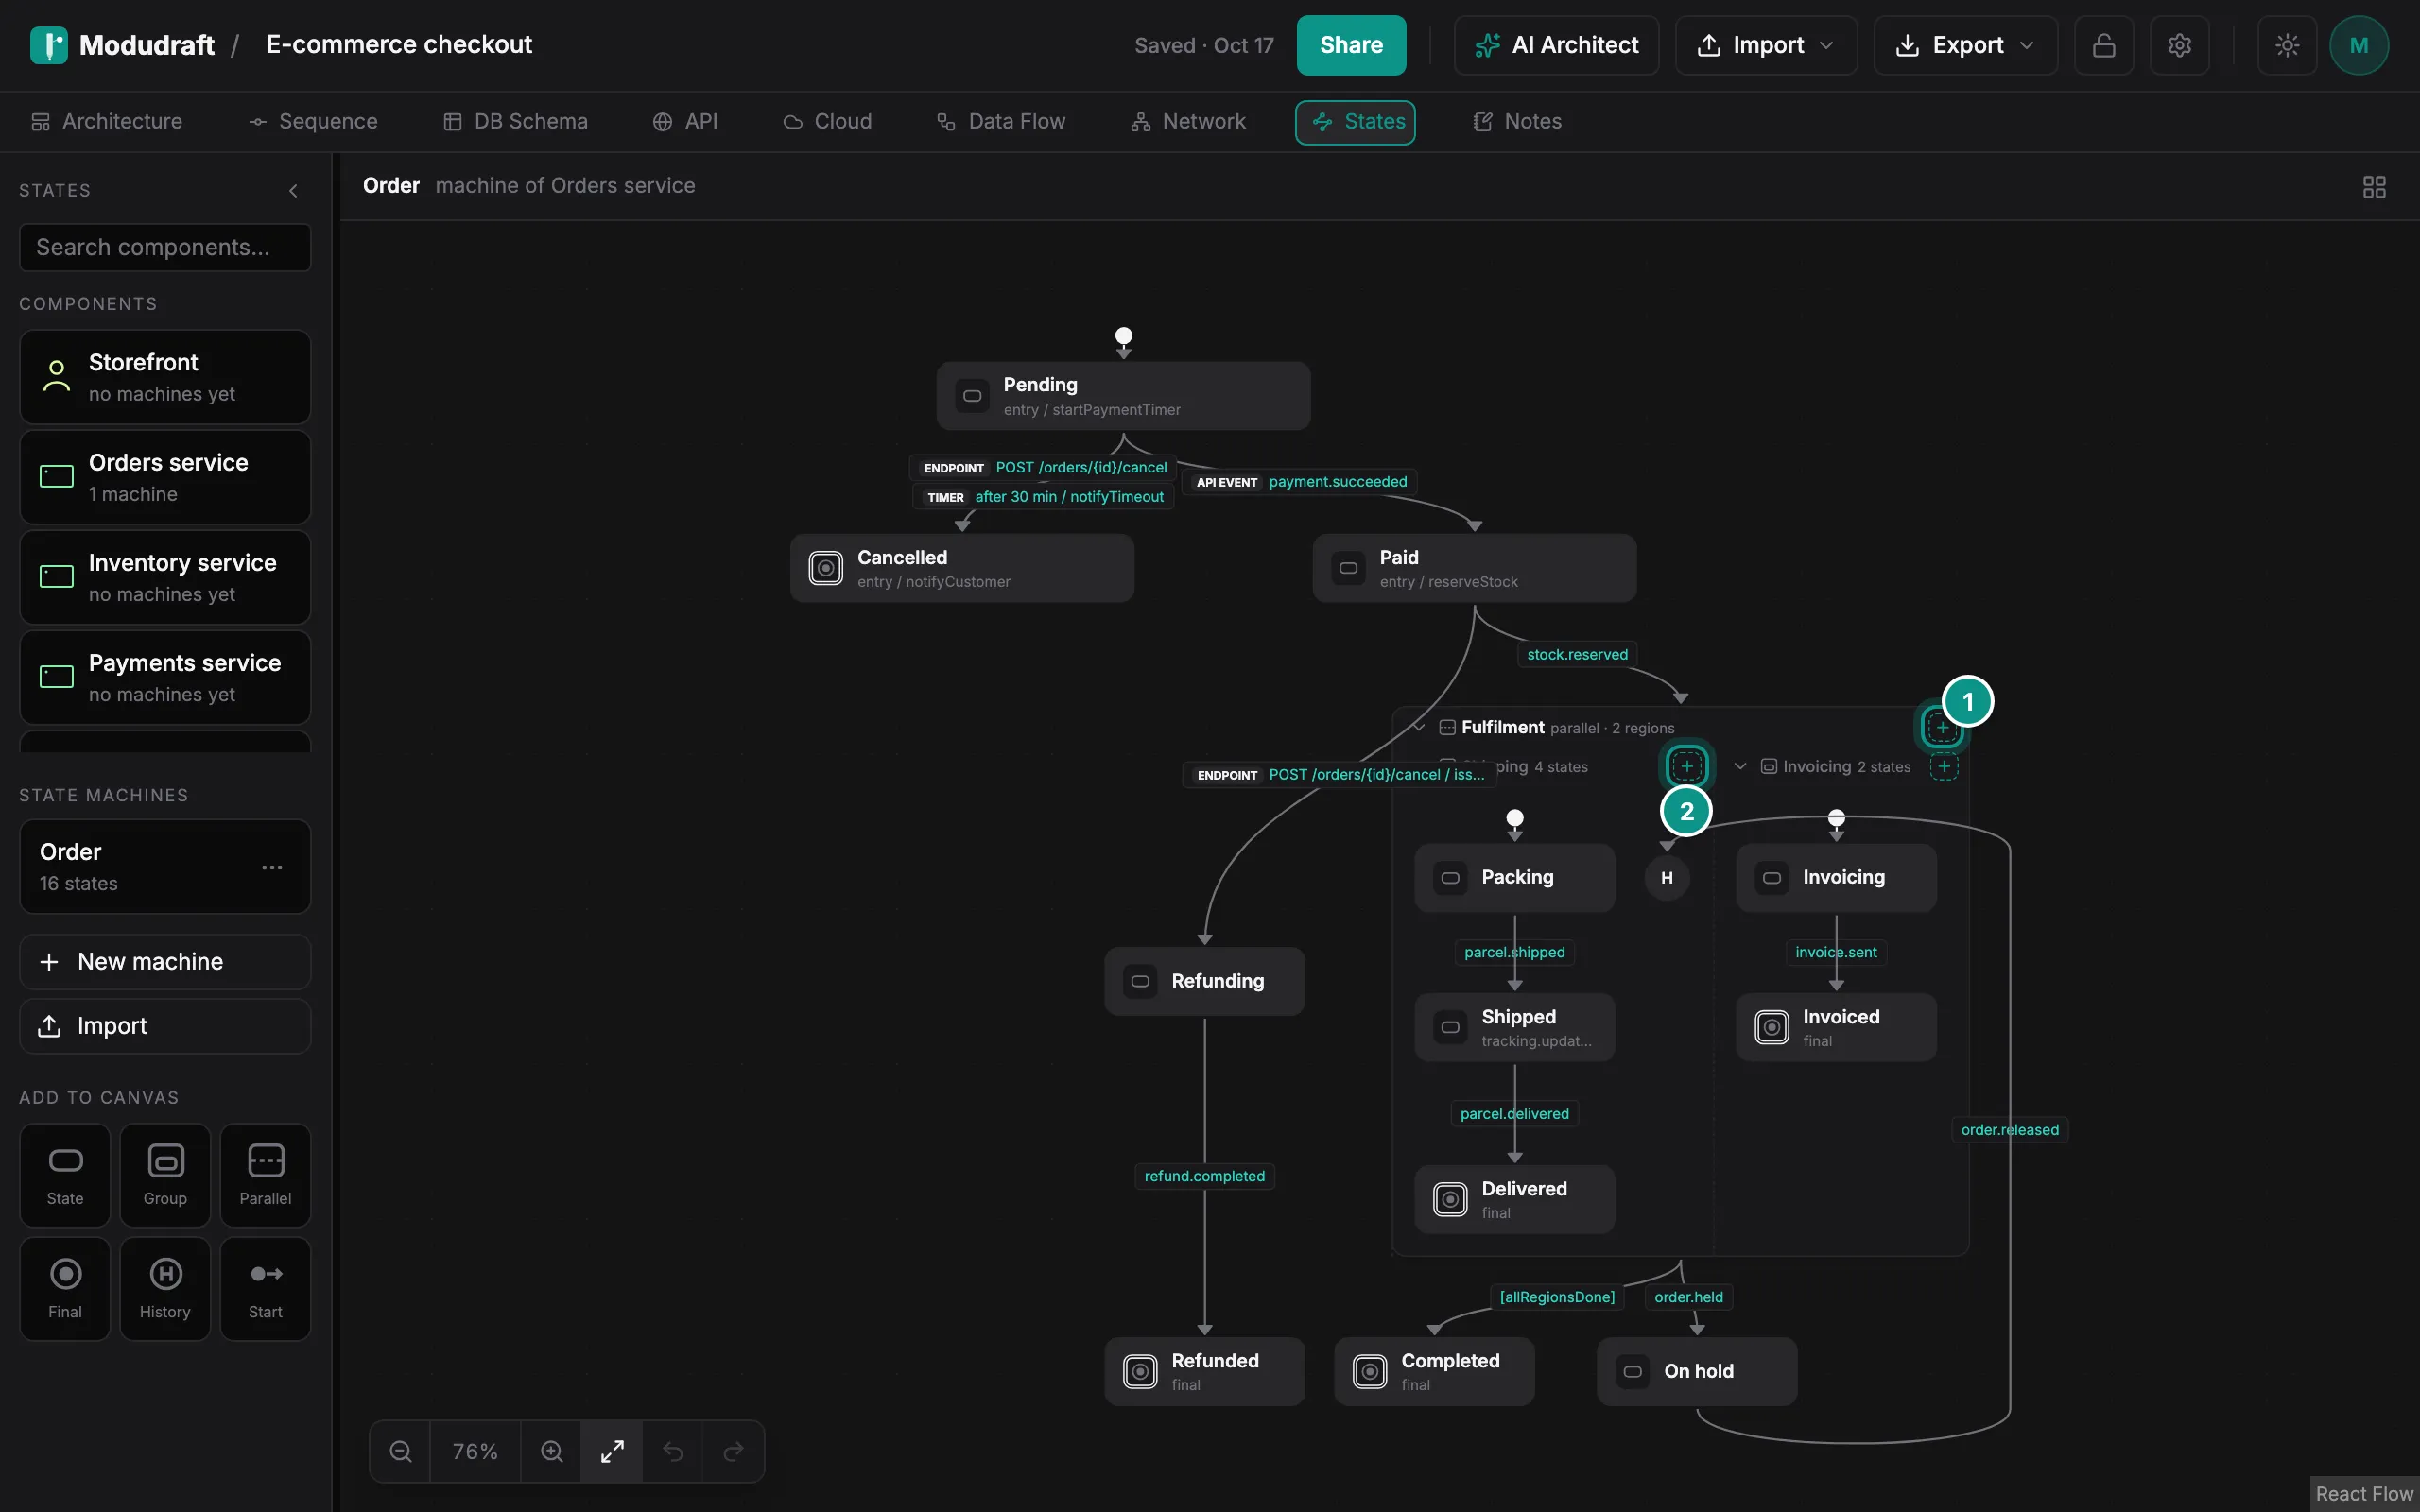
A group holds states inside it. A parallel state holds regions that are all active at once, such as shipping and invoicing.
The + in a parallel state’s header (1) adds a region. The + in a group’s header, or in a region’s header (2), adds a state inside it. Drag a state into a group or a region to move it in, and out again to move it back to the top level. The arrow in a group’s header hides what is inside it.
Set a trigger
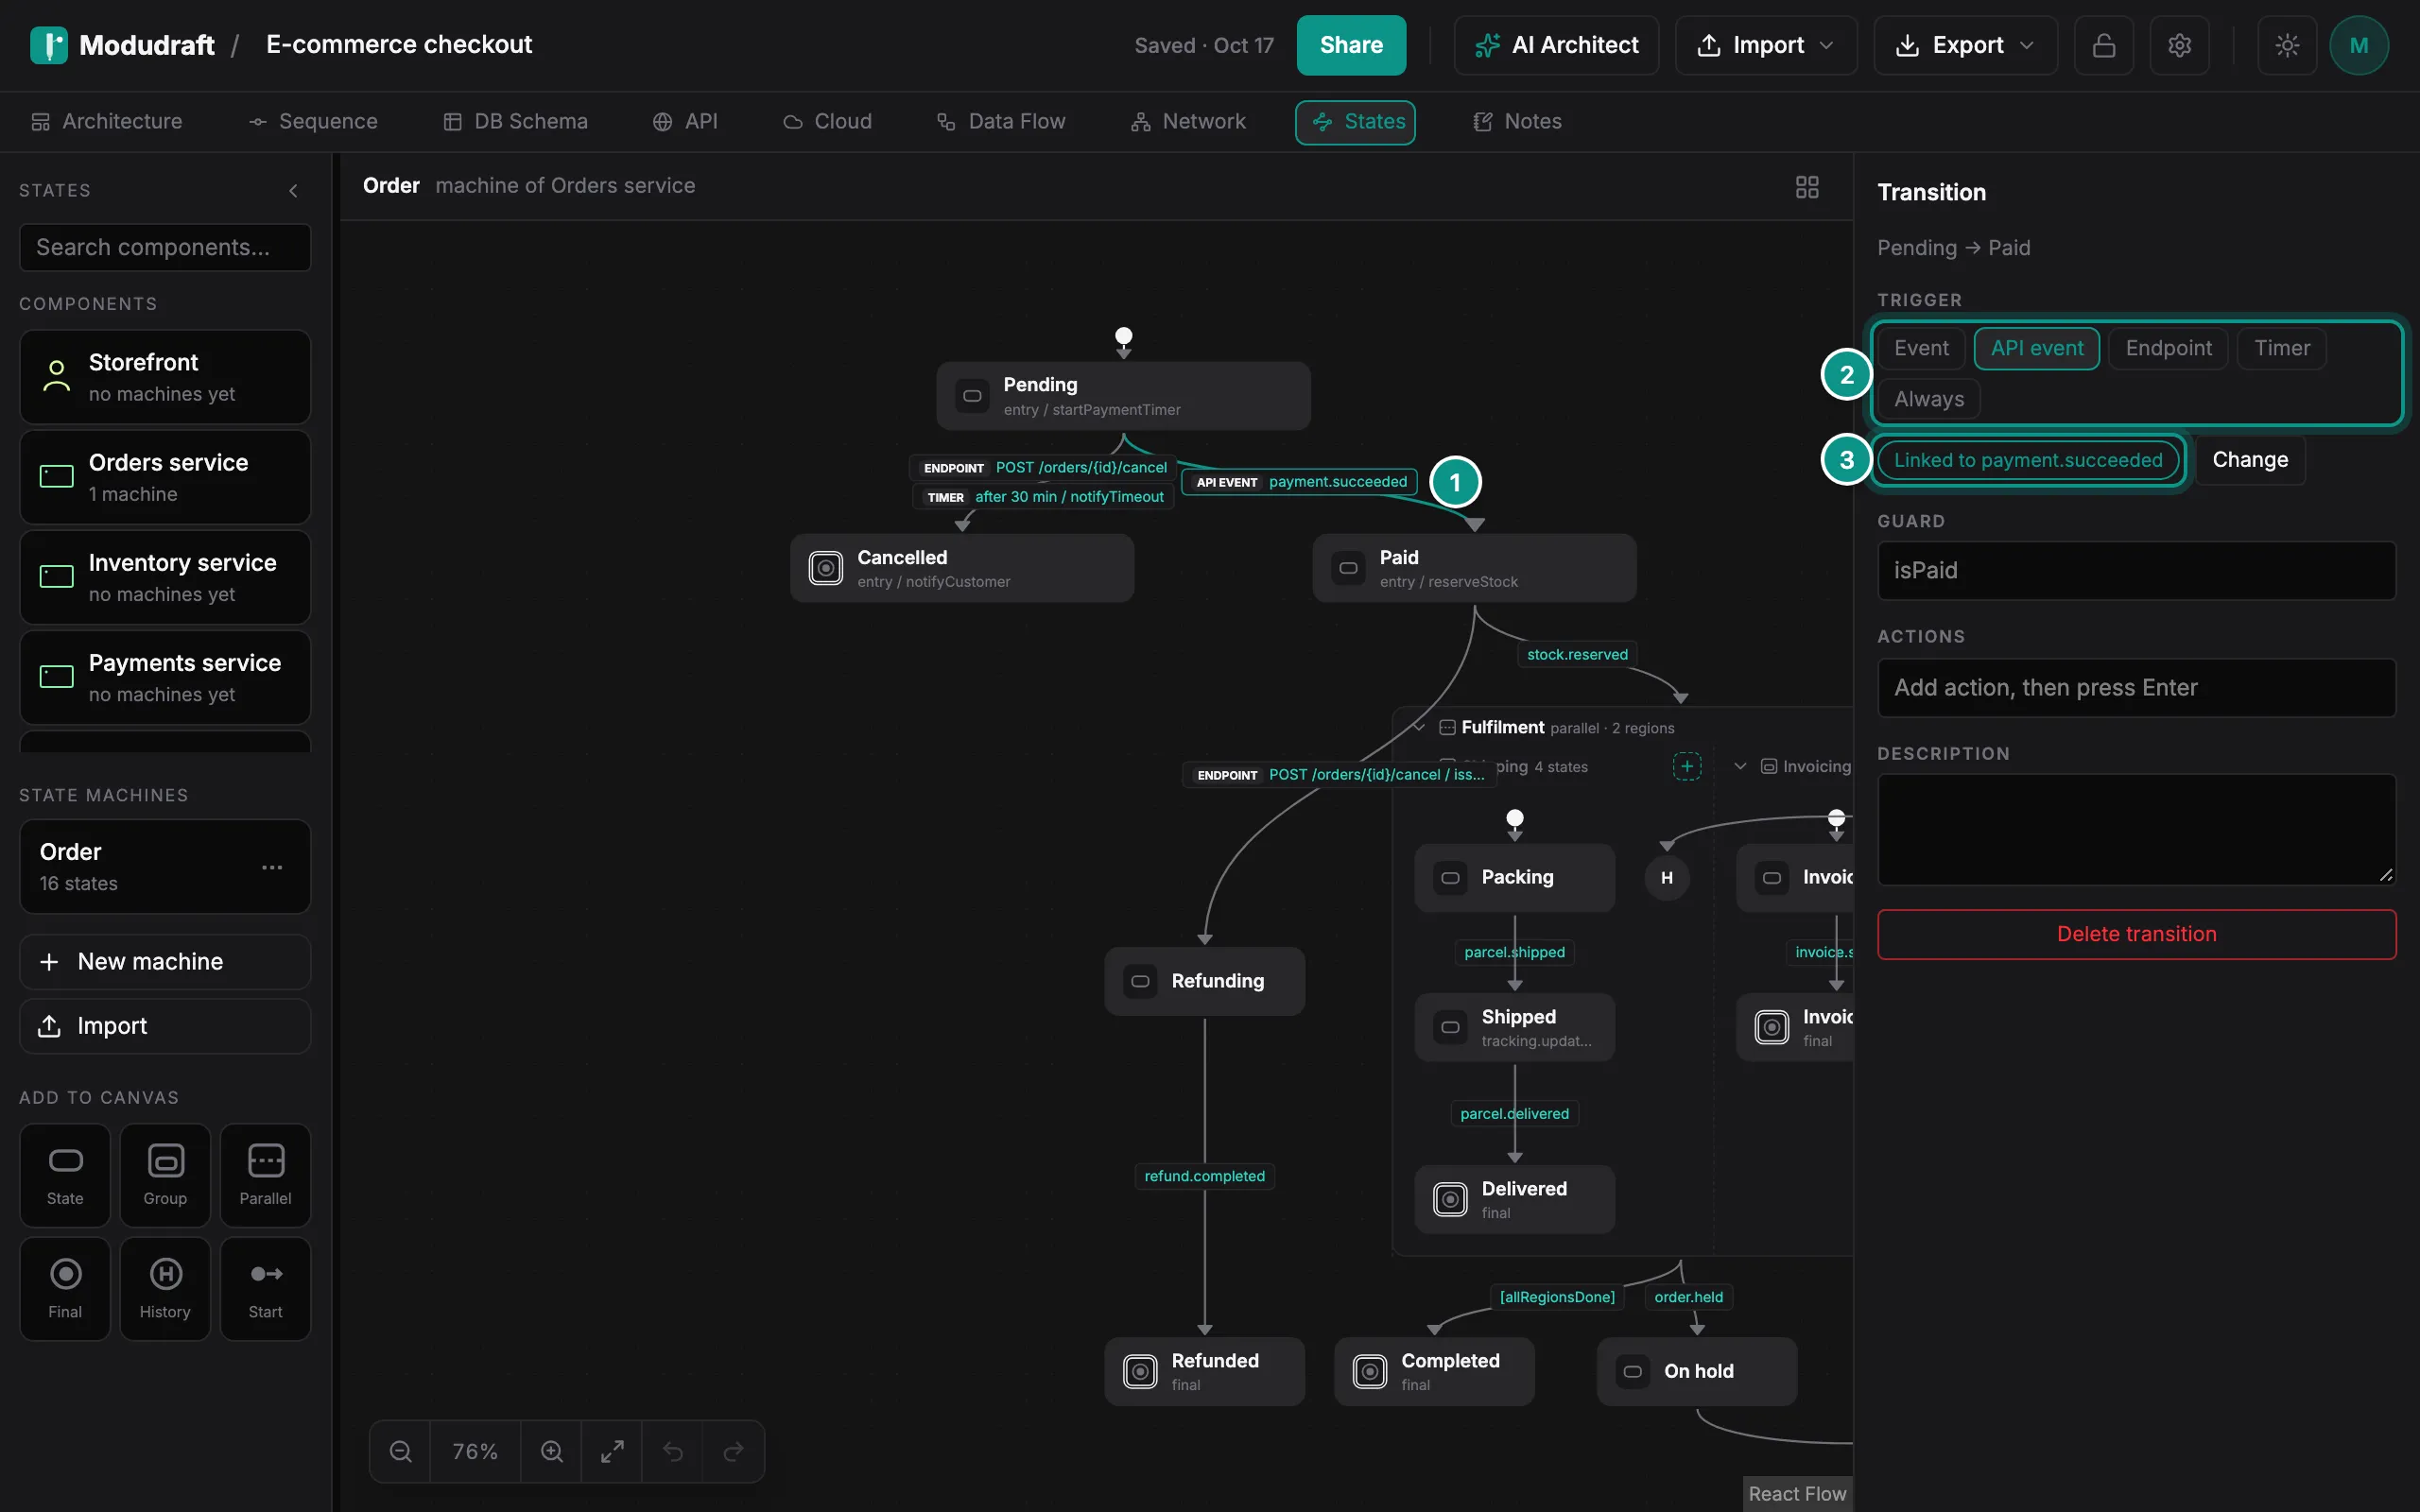
Click an arrow (1) to select it. The right panel opens with the transition. It only opens when you select a state or an arrow, and clicking empty canvas closes it.
Trigger has five kinds (2): Event, API event, Endpoint, Timer and Always. Event takes a name you type. API event and Endpoint let you search the events and endpoints on your API tab. Here the trigger is the API event payment.succeeded (3). Timer takes a delay in milliseconds, seconds, minutes or hours.
Below the trigger you can add a guard, actions and a description. Rename the event on the API tab and the arrow shows the new name.
Entry actions and Start here
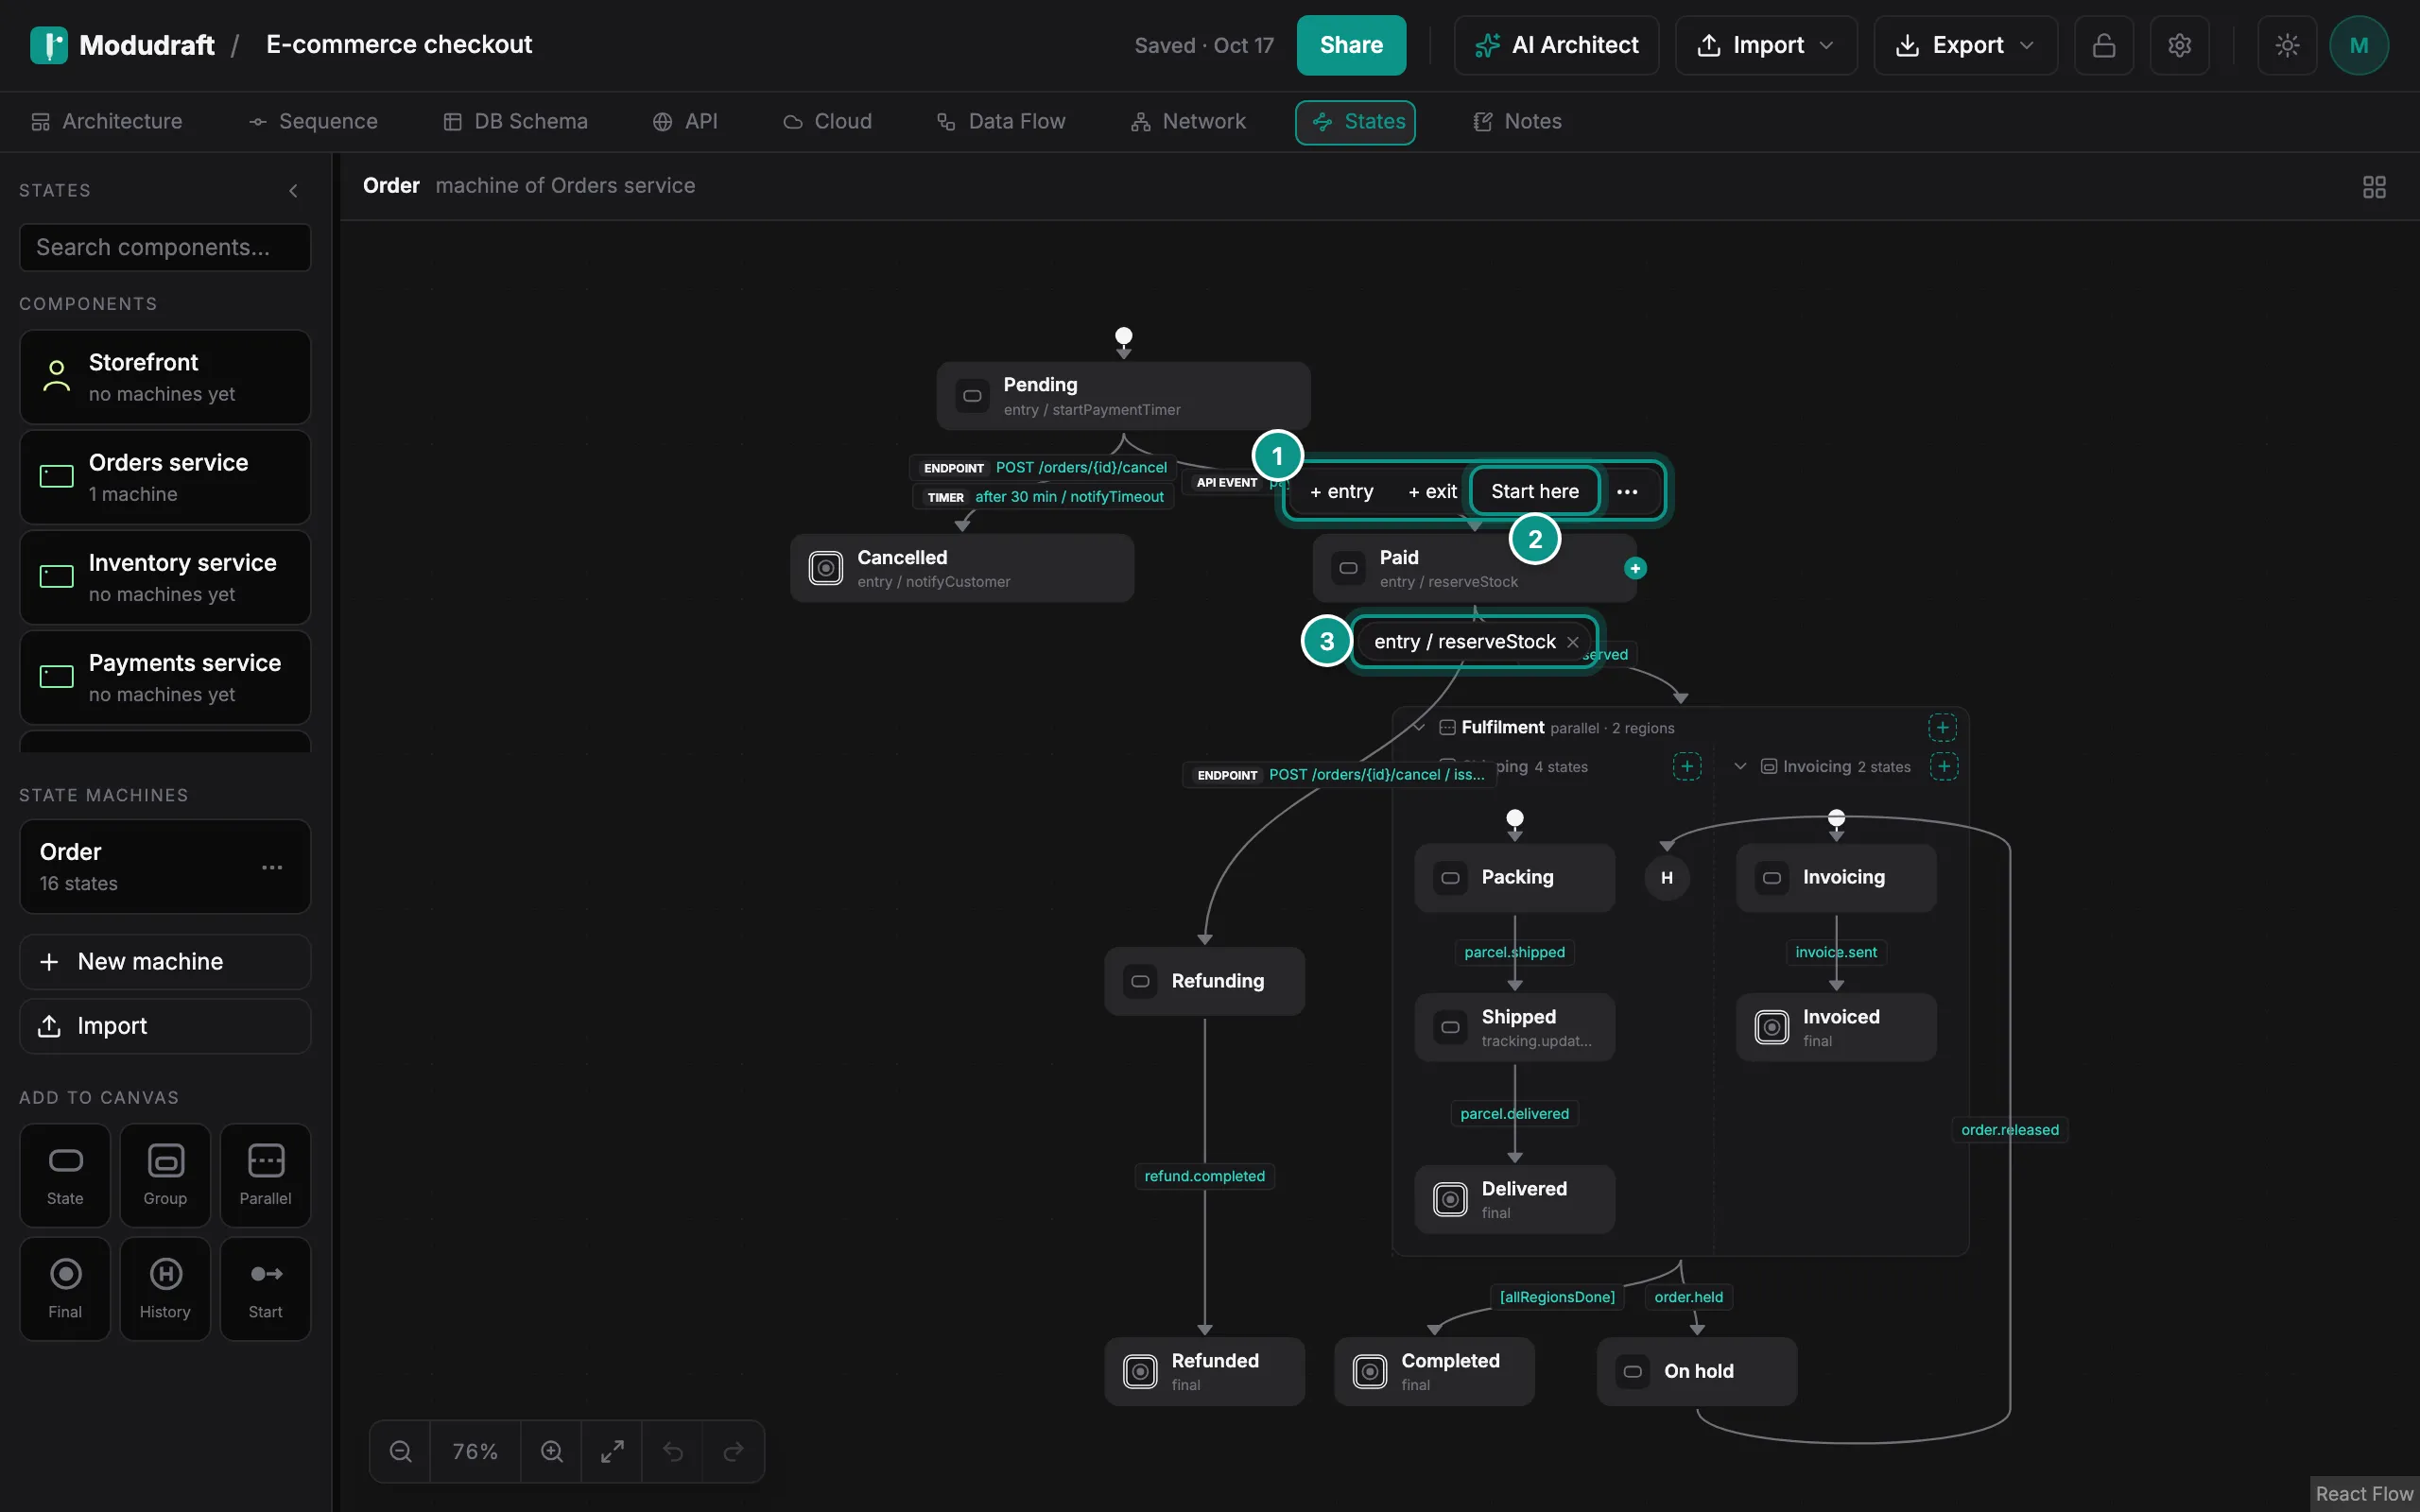
Hover a state, or select it, to see a toolbar above it (1). + entry and + exit add an action that runs when the state is entered or left. Click Start here (2) to make the state the first one of its machine, or of its group.
The actions show as chips under the state (3). Click a chip to edit it, or its x to remove it. The ⋯ in the toolbar has more: rename, change kind, move into a group, add a transition and delete.
Warnings and export
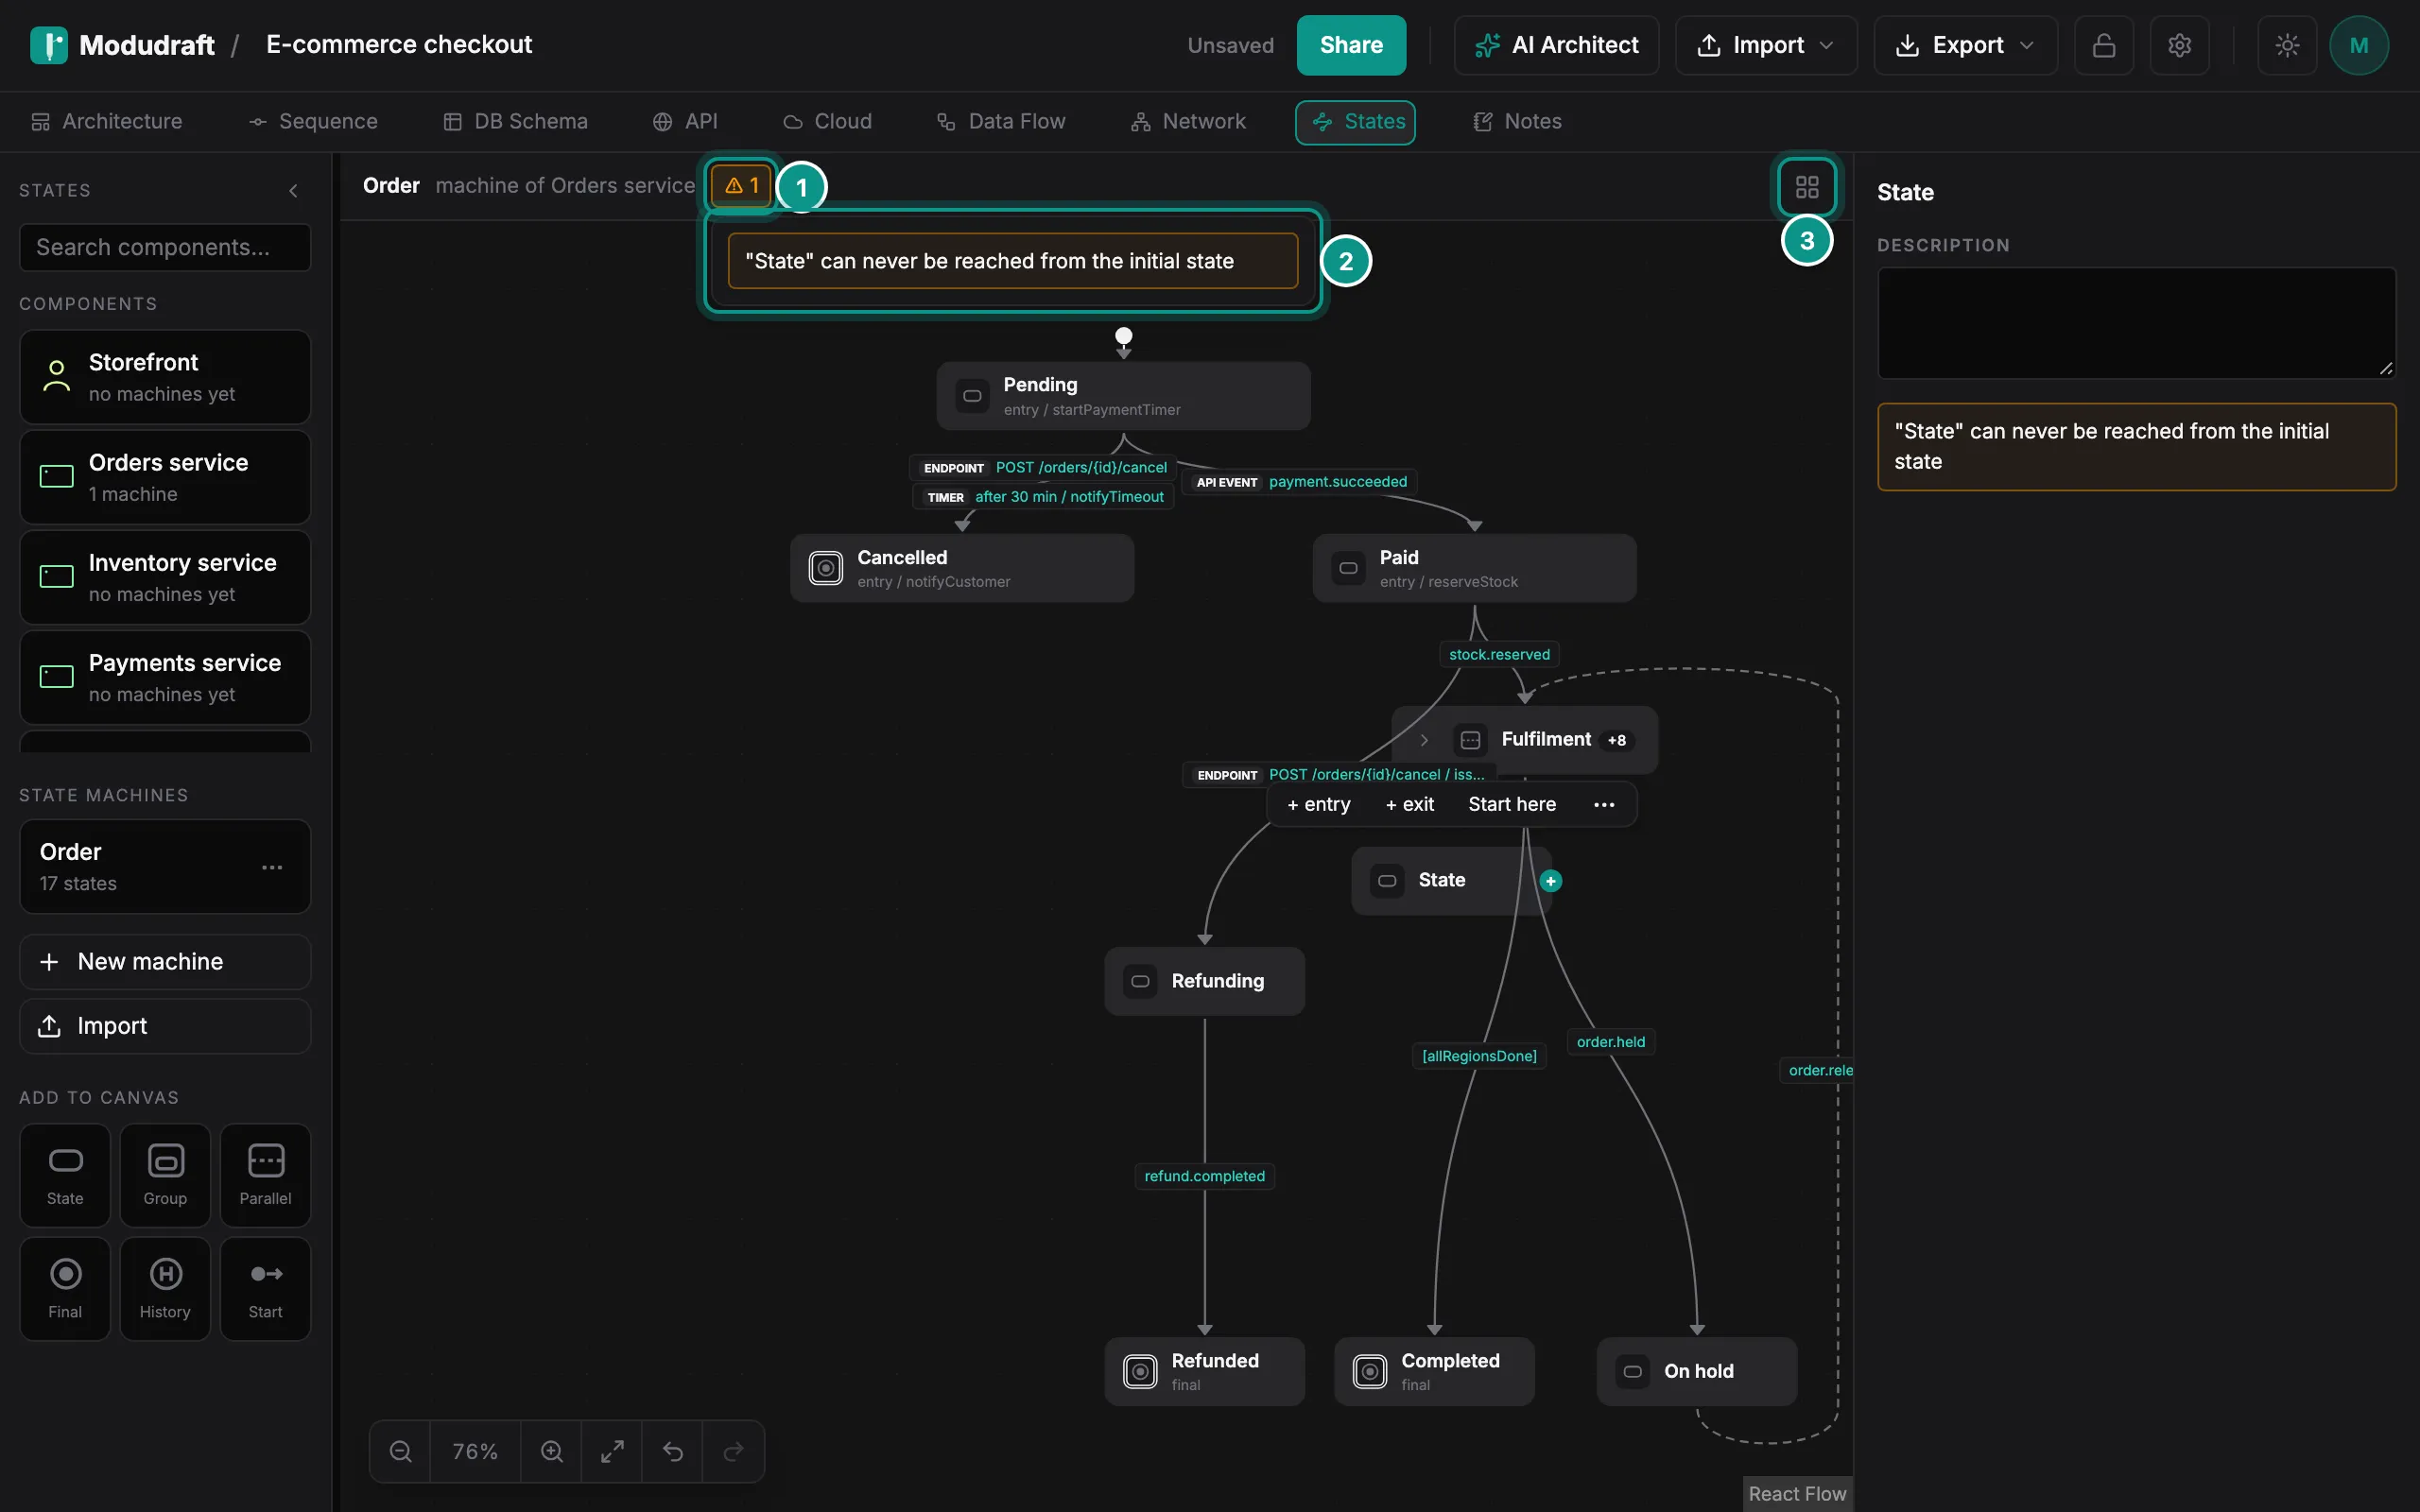
When something looks wrong, a ⚠ button with a count appears in the toolbar above the canvas (1). Click it to see the list (2). Here the machine has a new State that no arrow leads to. Click a warning to select what it is about. Some warnings have a button that fixes them, such as Add as consumer.
Auto-layout is the grid icon in the same toolbar (3). To export, open Export in the editor toolbar and, under This tab, choose State machine…. It gives you the machine as Mermaid, XState or PlantUML, to copy or download. Import in the editor toolbar has a State machine… item too.
Your agent builds the whole machine in one step. Agents connect through the MCP server, which comes with Pro. The agent guide shows how.
Next, keep your decisions next to the diagram in the Notes guide.